
![]()


This packages makes it easy to create data-grid for your Laravel application, for example admin panels, or any other searchable and sortable list. This package comes with 2 frontend options:
- Grid.js
- DataGrid's own Vue 3 frontend.
Both frontends offer server side functionalities like searching, sorting and pagination.
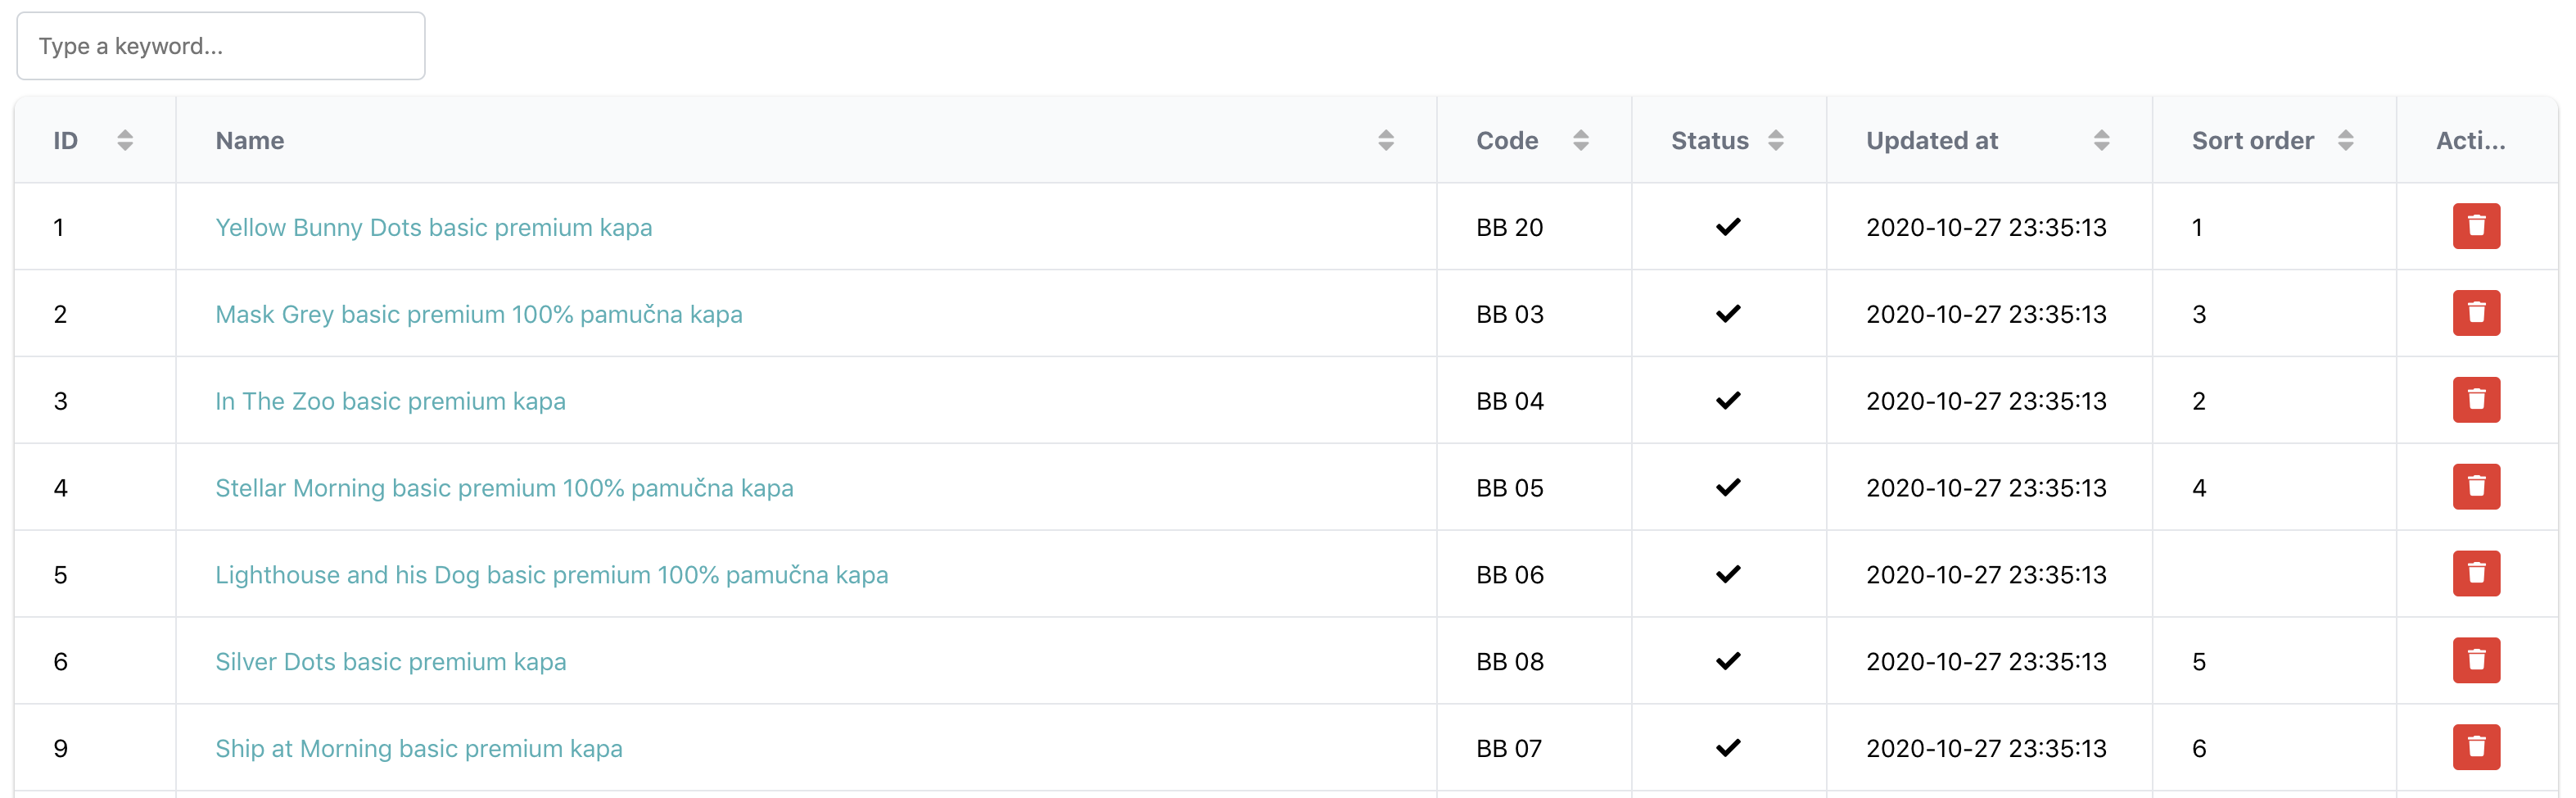
Please find a demo application here and the source code of the demo application here;
You can install the package via composer:
composer require wdev-rs/laravel-datagridOptional - if you use Grid.js install the package with npm
npm install gridjs@^6.0.0 Publish the vendor files by running the following command:
Using Grid.js frontend
php artisan vendor:publish --provider="WdevRs\LaravelDatagrid\LaravelDatagridServiceProvider" --tag="gridjs"Register the DataGrid fronted Vue.js component by adding the following lines to your app.js:
import DataGrid from "./vendor/laravel-datagrid/gridjs/Components/DataGrid.vue";

app.component('data-grid', DataGrid);
Use the component in your view file (or in another component):
<data-grid
    base-url={{$baseUrl}}
    :columns="{{json_encode($columns)}}"
    :rows="{{json_encode($rows)}}"
></data-grid>
Using Datagrid Vue 3 frontend
php artisan vendor:publish --provider="WdevRs\LaravelDatagrid\LaravelDatagridServiceProvider" --tag="datagrid"Register the DataGrid fronted Vue.js component by adding the following lines to your app.js:
import DataGrid from "./vendor/laravel-datagrid/datagrid/Components/DataGrid.vue";

app.component('data-grid', DataGrid);
Use the component in your view file (or in another component):
<data-grid
    :columns="{{json_encode($columns)}}"
    :rows="{{json_encode($rows)}}"
></data-grid>The base of this package is the \WdevRs\LaravelDatagrid\DataGrid\DataGrid class. This class is used to define the
columns and the behavior of the datagrid. While you can use this class directly from the controller, I
suggest extending it and create separate classes for each datagrid.
class CategoriesDataGrid extends DataGrid
{

    /**
     * CategoriesDataGrid constructor.
     */
    public function __construct()
    {
        $this->fromQuery(Category::query())
            ->column('id', 'ID', null, 50)
            ->column('name', 'Name', function ($category) {
                return view('admin.categories.actions.edit_link', ['category' => $category])->render();
            })
            ->key('id')
    }
}
Using the fromQuery method you can define what should be the base query for the DataGrid. It accepts a Laravel Query Builder object.
The column method is used to define the columns of the DataGrid, the argument are as follows:
id- the name of the field in the databasename- the label which should appear in the DataGrid column headerformatter- optional, callable allows you to format the display of the column. As you can see from the above example probably the most elegant way to do this is to include a blade view and render it.width- optional, the with of the columnsortable- optional, boolean if the column should be sortable, default truesearchable- optional, boolean if the column should be searchable, default true
The key method defines the unique identifier for the rows, usually id. Specifying the
key is necessary for the mass actions to work when using datagrid frontend.
You can create data grid from different data sources:
- Eloquent queries - use the fromQuery() method
- Collections - use the fromCollection() method
- Arrays - use the fromArray() method
When the DataGrid definition is ready, you can add it to the controller:
    public function index(CategoriesDataGrid $dataGrid, Request $request)
    {
        return $dataGrid->render();
    }
If the render method is called without arguments it will use the default view resources/views/vendor/laravel-datagrid/datagrid.blade.php,
or you can pass your own view and use the DataGrid there:
    public function index(CategoriesDataGrid $dataGrid, Request $request)
    {
        return $dataGrid->render('admin.common.index');
    }
If you use Inertia for frontend, you can configire laravel-datagrid to use inertia for rendering instead of blade. First publish the config file:
php artisan vendor:publish --provider="WdevRs\LaravelDatagrid\LaravelDatagridServiceProvider" --tag="config"Change the rendering method in the published config/laravel-datagrid.php:
'render_with' => \WdevRs\LaravelDatagrid\LaravelDatagrid::RENDER_INERTIANow you can pass the name of the vue component to the render method, it
is going to be rendered with Inertia.
-
make:datagrid ~ Generates datagrid class
Generates datagrid class, the generated class is placed in \App\DataGrids directory
- -M|--model name of the model to use
- -F|--fields the name of the fields of the comma separated: 'field1,field2,field3' or 'field1:label1,field2:label2,field3:label3'
Generated class
    class CategoriesDataGrid extends DataGrid
    {

        /**
         * CategoriesDataGrid constructor.
         */
        public function __construct()
        {
            $this->fromQuery(Category::query())
                ->column('id', 'ID', null, 50)
                ->column('name', 'Name')
        }
    }
The frontend component of the DataGrid can be found in the resources/js/vendor/laravel-datagrid/gridjs/Components/DataGrid.vue
By default DataGrid comes with one row action, which is the delete action. This action can be found in the following file:
resources/js/vendor/laravel-datagrid/gridjs/actions/delete.js
You can extend it with more custom actions by creating them based on the existing one. To add the to the datagrid,
extend the cols definition in the DataGrid.vue:
            cols: this.columns.map((col) => {col.formatter = (cell) => html(cell); return col;}).concat(
                [{
                    name: 'Actions',
                    sort: false,
                    width: 50,
                    formatter: (cell, row) => {
                        return h('div', {className: "text-center"},
                            deleteAction.call(this, row.cells[0].data,row.cells[1].data),
                            yourCustomAction.call(this, row.cells[0].data,row.cells[1].data)
                        )
                    }
                }]
)Datagrid's own vue 3 frontend offers extended functionality compared to grid.js, for example mass actions, filters and row action customisations.
Mass actions is a method to run specific action on multiple records. For example delete multiple records at once.
When using mass actions I suggest using datagrid in a wrapper component.
Mass actions can be defined using the mass-actions prop in an array
[{'action' : 'massDelete', 'label': 'Delete'}]
Datagrid will fire an event when the user selects rows and runs an action on them.
The name of the event is what you defined in the action property, in this case massDelete.
Handle the event on the usual way, the handler gets the array of selectedIds as an argument:
@massDelete="(selectedIds) => alert('Simulating mass delete on id(s): ' + selectedIds.join(','))"Please find the code of the complete component below.
<script setup>
    import DataGrid from './../vendor/laravel-datagrid/datagrid/Components/DataGrid.vue'

    const props = defineProps({
        columns: Array,
        rows: Object,
    });

    const alert = (text) => {
        window.alert(text);
    }
</script>

<template>
    <data-grid
        :columns="props.columns"
        :rows="props.rows"
        :mass-actions="[{'action' : 'massDelete', 'label': 'Delete'}]"
        @massDelete="(selectedIds) => alert('Simulating mass delete on id(s): ' + selectedIds.join(','))"
    ></data-grid>
</template>
DataGrid by default adds 2 row action to all rows: edit and delete.
You can easily customise these actions using the actions slot:
    <data-grid
        :columns="props.columns"
        :rows="props.rows">

        <template #actions="{row, key}">
            <div class="flex flex-wrap justify-around">
                <a :href="'/'+row[key]+'/edit'"
                   class="font-medium text-blue-600 dark:text-blue-500 hover:underline mr-3">
                    <EditIcon class="fill-blue-600" :title="'Edit'"></EditIcon>
                </a>
                <a :href="'/'+row[key]+'/show'"
                   class="font-medium text-blue-600 dark:text-blue-500 hover:underline mr-3">
                    Show
                </a>
                <a :href="'/'+row[key]+'/export'"
                   class="font-medium text-blue-600 dark:text-blue-500 hover:underline mr-3">
                    Export
                </a>
            </div>
    </template>
</data-grid>If you'd like to make a more detailed search function instead of the default
search input field, use the filters slot.
    <data-grid
    :columns="dataColumns"
    :rows="dataRows"
>
    <template #filters>
        <form  class="p-3 mb-6 rounded bg-gray-50" @submit.prevent="filter">
            <div class="grid grid-cols-1 sm:grid-cols-2 gap-4">
                <div class="mx-1">
                    <InputLabel>Name</InputLabel>
                    <TextInput
                        id="name"
                        v-model="filters.name"
                        type="text"
                        class="block w-full mt-1"
                    />
                </div>
                <div class="mx-1">
                    <InputLabel>Code</InputLabel>
                    <TextInput
                        id="name"
                        v-model="filters.code"
                        type="text"
                        class="block w-full mt-1"
                    />
                </div>
            </div>
            <div class="mt-5 mb-2 ml-1 flex">
                <PrimaryButton>
                    Search
                </PrimaryButton>
                <SecondaryButton class="mx-3" @click="reset">
                    Reset
                </SecondaryButton>
            </div>
        </form>
    </template>
</data-grid>
Add your custom logic on the frontend for collecting the data and submitting to the
search endpoint, using the ServerConfig class, for example:
    <script setup>
        import {ref} from "vue";
        import {ServerConfig} from "../vendor/laravel-datagrid/datagrid/ServerConfig";

        const dataColumns = ref(props.columns);
        const dataRows = ref(props.rows);

        const customFilteringEnabled = ref(false);

        const filters = ref({
        name: '',
        code: ''
        });

        const server = new ServerConfig();

        const filter = () => {
            const params = server.params();
            params.delete('search');
            params.delete('page');
            params.delete('limit');

            params.set('filters[name]', filters.value.name);
            params.set('filters[code]', filters.value.code)

            server.get(params).then((data) => {
                dataRows.value = data;
            });
        };

        const reset = () => {
            filters.value = {
                name: '',
                code: ''
            };

            const params = server.params();
            params.delete('filters[name]');
            params.delete('filters[code]');
            params.delete('page');
            params.delete('limit');

            server.get(params).then((data) => {
                dataRows.value = data;
            });
        }
    </script>
On the backend override the search method of the base DataGrid class,
to implement the custom filtering.
    public function search(?string $search): DataGrid
    {
        parent::search($search);

        $filters = collect(request()->get('filters'));

        $name = $filters->get('name');
        $code = $filters->get('code');

        $this->dataSource->query->when($name, fn ($query) => $query->where('name', 'like', '%'.$name.'%'));
        $this->dataSource->query->when($code, fn ($query) => $query->where('code', 'like', $code.'%'));

        return $this;
    }
Please check out the demo application's source code for a more details about how to implement these customisations here: Laravel DataGrid demo
The demo app can be found here.
Update the vendor assets using --force option:
Using Grid.js
php artisan vendor:publish --provider="WdevRs\LaravelDatagrid\LaravelDatagridServiceProvider" --tag="gridjs" --forceUsing datagrid frontend
php artisan vendor:publish --provider="WdevRs\LaravelDatagrid\LaravelDatagridServiceProvider" --tag="datagrid" --forceUpdate the import paths in the app.js to use correct DataGrid component (grid.js or datagrid), see the example above.
Update the usage of the data-grid component to pass the rows property:
<data-grid
    base-url={{$baseUrl}}
    :columns="{{json_encode($columns)}}"
    :rows="{{json_encode($rows)}}"
></data-grid>composer testPlease see CHANGELOG for more information what has changed recently.
Please see CONTRIBUTING for details.
If you discover any security related issues, please email daniel@wdev.rs instead of using the issue tracker.
The MIT License (MIT). Please see License File for more information.
This package was generated using the Laravel Package Boilerplate.